
 |
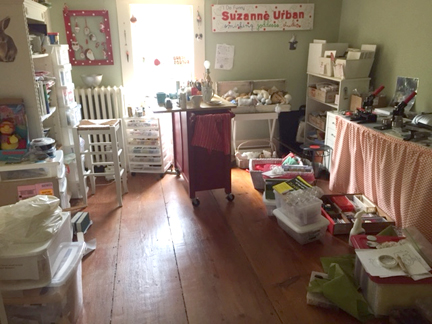
| BEFORE |
Due to the fact I run two ETSY shops smirkinggoddess and SuzanneUrban I'm often at odds between making space to create my art and making space to fill orders for my magnets and pinbacks. This past year things got really out of hand as I embarked on working full-time out of my home. Gearing up for the future holiday season, that will be upon us soon, I took a week out to finally turn my studio into a space that would enhance my work schedule and creativity. And yes it took a full seven days to implement a new studio order. Below are
 |
| AFTER |
1. Don't hang on to space stealers! I had a large armoire that took up a lot of room in my studio, it was a closet armoire so there were no shelves inside to store supplies. I kept posting it on Craigslist to no avail, I even lowered the price hoping to get some kind of money out of this thing. Finally one guy showed up and decided it "smelled funny" then left. It doesn't smell funny. I finally offered it for free to my husband and his partner's Vintage Hi-FI museum, where it's already been put to good use. Getting it down our antique home's stairwell wasn't easy.
2. Buy storage furniture on wheels! Whether you purchase plastic storage containers or something more upscale-look for those with coasters. Little wheels allow you to easily access supplies that are hidden, as mine are, under a table with a polka-dot skirt.
3. What to paint your walls? I regret the sage green walls in my studio. Originally this room was going to be our guest room, but due to the adjoining computer room my husband convinced me to take it as I also work digitally. But the room already was painted. The green is too dark in a room with one window-yet it looks terrific in our kitchen. FYI the color blue is supposed to stimulate creativity.
4. Label Stuff! Out of sight for many of us means out of mind. Don't put yourself in the position to buy a supply you thought you'd used up only to discover you had plenty tucked or rather hidden away. Don't just slap masking tape up and handwrite something, now-a-days you can find all kinds of label designs to download on your computer.
5. Store stuff in homogenous groups: This was the first time I've ever spent so much time thinking out where to store craft and art supplies, art prints, magnets, pinbacks, books, reference material, art dolls and more. Make an effort not to give up and just shove a bunch of unrelated stuff away, this laziness generated more thoughtless quick clean ups in the past, and then stuff got buried.
6. Supplies you can't use? It's nice to put them on Craigslist, and I've sold stuff on CL but waiting for someone who would come to your house to give you $ for a small purchase is time consuming, donate to your local library, school or Goodwill or give to a creative friend so you can swiftly move forward. And if you feel ambivalent about giving something up, keep it, your subconscious is telling you you will use it someday.
7. Feel you can't afford the right kind of studio furniture? I wanted to purchase a white desk but my budget constraints are tight this year due to leaving the day job in 2014. Finally I looked in our basement and grabbed a porcelain topped table with wood legs left by our home's former owner. I painted the legs red, popped in a white drawer pull and it's been a lifesaver! Look around your house and see what you already have that might work better in your space.
8. Figure out ways to hide clear storage containers: It's overwhelming to have containers with a jumble of stuff in them staring back at you, even if they are in homogeneous groups. Rolling containers hidden under a table with decorative skirt works well! And wicker baskets, or colorful wood containers or antique boxes look great. In fact, I've got my eye on a wicker trunk on Craigslist. Attractive storage pieces makes a studio feel more inviting to create in.
8. Feng Shui your space! I'm a big believer in Feng Shui, if you don't know what it is google or check here: Feng Shui. Basically it's an ancient spiritual practice to improve or uplift the energy in your space. Since successfully organizing my studio, I'm finding my productivity has increased, more projects are getting finished, and I've adapted to putting supplies away easily instead of leaving them out. So I can definitely proclaim the Chi has improved in my studio!
9. BE FLEXIBLE! Don't be afraid to move furniture around until your space works, even if after careful thought you drew a map, or made your mind up, I ended up moving my kitchen island twice, which served as a drawing painting table but now is dedicated to my pinback/magnet business.
10. My friend artist Barbara Sparks gave me a wonderful tip when we were both teaching children at the Silvermine College of Art. She suggested breaking up the classroom into difference work spaces, i.e. drawing center, painting area, sculpting area etc. as children have short attention spans and need to move around. Having dedicated areas or centers in your studio for specific tasks is very important. Even if you have a small room, try to break up your area to keep one for messy creative and one for mailing out/processing.
My studio re-org even inspired my husband to purchase a track lighting kit at Lowes to install. Now the light is fantastic and I feel very ready for the holiday season!

How inspiring! Your beautiful new studio feels like the "Center of your Creative Life"
ReplyDeleteand compliments your delightful vintage house. Thank you so much for sharing.